Course Options, Course Option Fee Codes, and Course Option Rules can be configured to create optional charges or discounts for things such as honors programs and multi-course discounts.
There are five steps involved with setting up these Course Option Codes:
Note:Images demonstrating actions appear under the text that describes it.
Step 1: Create a Course Option
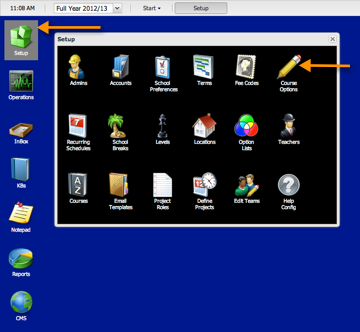
From the Main Administrative Interface,
- Click Set Up
- Click Course Options
(See image depicting these actions below)
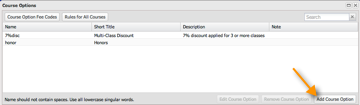
- Click Add Course Option button in bottom right corner
(See image depicting this action below)
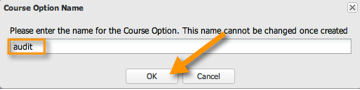
- Enter a name for the Course Option. Name fields are usually used in scripts and can not be edited so follow these rules when entering a name:
-use a noun or verb
-you can include numbers, but it can't start with a number
-keep it short
-no spaces (use an _ to separate words)
-all lower case
-singular
-it should make sense to you, but won’t be visible to families
- Click OK when done
(See image depicting these actions below)
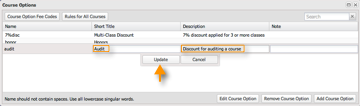
- Then enter a title for the Course Option. This is very similar to the name, however, this field will be visible to families in a comma separated list such as a summary of options available. It needs to make sense to families, but you don’t want it to take up too much space on a line. So keep it short-1 word.
- Enter description. Again this information will be visible to families and will provide more details about the Course Option.
- Click Update.
(See image depicting these actions below)
Step 2: Add Course Option Fee Codes
Note:These Option Fee Codes are not tied to Terms.
Step 3 (Optional): Apply Course Option Rules to All Courses within a Term
This step will make the options and fee codes you just created available to all the courses within a particular term. If you don’t want to make them available to all courses within a term you can skip this step and proceed to Step #4 where you can apply the options to specific courses only.
Note:Limited to the selected term. So you will have to repeat the step if you want to apply the options to multiple terms.
If you want to apply the option to all courses in a selected term:
Step 4 (Optional): Apply Option Fee Code to a Specific Course or Section
Note: If you applied the option to all courses in a selected term in Step #3 then you don't need to associate the option fee code to specific courses in that term unless you want to override the option to all courses for specific courses/sections. (To change the assignment option for one course for example.)
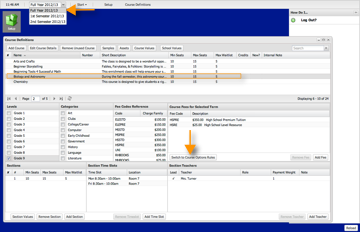
- Go back to Set Up menu view
- Click Courses icon
(See image depicting these actions below)

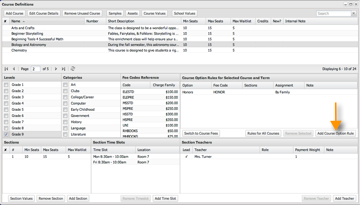
- Select the term
- Select the course
- In the Course Fees Section, click Switch to Course Options Rules button
(See image depicting these actions below)
- Click Add Course Option Rule
(See image depicting this action below)
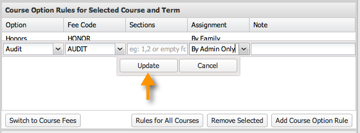
- In the Option column, select the Course Option from the drop down list
- In the Fee Code column, select your Course Option Fee Code from the drop down list
- In the Sections column, leave blank if you want the option available to all sections of the course. Otherwise list the course section number of the sections that you want to apply the option to. Separate the numbers by commas if there are multiple sections. (e.g. 1,5, 6)
- Choose Assignment. This will determine who can apply the option to a seat.
-If you choose By Admin only, then only admin can assign from admin pages.
-If you choose By Family then families will be able to select the Course Option during enrollment process (Please note, that families will not be able to remove the Course Option after enrolling. Instead they will have to contact administration to request that the Course Option be removed from their enrollment.)
-If you choose Always then the option will automatically be applied to all course enrollments.
-If you choose Never then the option will never be applied to course enrollments.
- In the Note column, enter a note (optional)
- Click Update
(See image depicting these actions below)
Step 5: Add or Remove Course Options (and Associated Fees/Credits) to a Specific Student Seat